FAQ

We’ve included some tips on how to get the most out of your drywall tools and get the best results for your drywall project.

  • Some drywall joint knives or trowels may have a sharp burr on the edge. This edge tends to pull the mud rather than smooth it out correctly. Remove the burr with a file or sandpaper. Make sure the corners are not bent. You may want to slightly round the corner of the trowel a little so that it doesn’t cut the paper when embedding the corners.
  • Many professionals apply the tape in this order: wall and ceiling edge joints, butt joints, vertical corners and then ceiling corners.
  • You can also use TapeBuddy for taping around shower fixtures, windows, doors, or anywhere you need to straighten out a rough edge. Pre-fill the rough edge space with setting type compound before taping.
  • If the mud compartment is full of mud and you notice that the tape roll is about to run out, you’ll need to empty the mud compartment to feed the new roll of tape. Or you can tape the new roll of tape to the end (if you catch it in time) and pull the new tape through the mud compartment.
  • Compound will dry out over night even in a sealed bucket. To help prevent this, clean the sides with water and maybe pour a little more water on the mud surface before sealing with the lid.
  • You can decrease the compound applied on the tape even more by applying one or two layers of duct tape over the insert, decreasing the mud gap.
  • TapeBuddy® tools hold about 4 pounds of drywall coumpound in the compartment, enough to coat about 110 to 120 feet of tape.
  • Want to fasten the tool down for a better hold? Drill a 3/16” hole on each side of the tool base then fasten it to a board or a piece of scrap drywall.

Frequently Asked Questions from Consumers

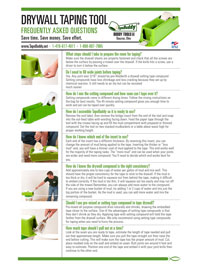
Make sure the drywall sheets are properly fastened and check that all the screws are below the surface by passing a trowel over the drywall. If the knife hits a screw, use a driver to turn it below the surface.

Yes. Any joint over 3/16” should be pre-filled with a drywall setting type compound. Setting compounds have less shrinkage and less cracking because they set up by chemical reaction. It still needs to air dry but can be recoated much sooner.

Setting compounds come in different drying times. Follow the mixing instructions on the bag for best results. The 45 minute setting compound gives you enough time to work and yet can be taped over quickly.

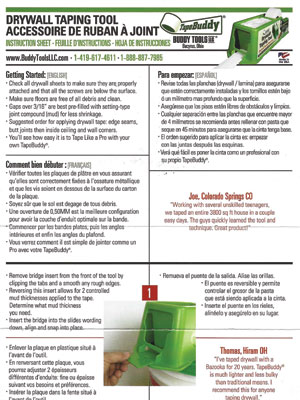
Remove the end label, then remove the bridge insert from the end of the tool and snap into the out-feed table with wording facing down. Feed the paper tape through the tool with the crease facing up and fill the mud compartment with prepared or thinned compound. Set the tool on two stacked mud buckets or a table about waist high for proper working height.

Each end of the insert has a different thickness. By reversing this insert, you can change the amount of mud being applied to the tape. Inserting the thicker or “less mud” end, you will have a thinner coat of mud applied to the tape. This end works well for the majority of the taping tasks. The “more mud” end can be used when your joints are wider and need more compound. You’ll need to decide which end works best for you.

Add approximately one to two cups of water per gallon of mud and mix well. This should have the proper consistency for the tape to stick to the drywall. If the mud is too thick or dry, it will be hard to squeeze out from behind the tape, making it difficult to embed correctly. If the mud is too thin, it will squeeze out too easily and may run off the side of the trowel. Remember, you can always add more water to the compound. If you are using a new bucket of mud, try adding 1 or 2 cups of water and mix just the top portion of the bucket. As the mud is used, you can add more water and mix the remaining compound.

Pre-mixed all purpose compound dries naturally and shrinks, drawing the embedded tape closer to the surface. One of the advantages of setting type compounds is that they don’t shrink as they dry. Applying tape with setting compound will hold the tape farther from the drywall surface. We only recommend using setting type compounds for taping when you need to hurry the process.

Look at the seam you are ready to tape, estimate the length of tape needed and pull out that approximate length. Make sure you pull the tape straight out then raise the end before cutting. This will make sure the tape has the proper amount of mud. Cut, place mudded side on the wall and embed on seam. Butt joints are around 4 feet and easy to estimate. Position one end of the tape and embed it with your joint knife then continue to the other end. Position your joint knife where you want the tape to stop and tear off the excess tape. This extra tape could be used or just discarded. Long seams are done with 5’ pieces or the length you can easily handle. The pieces can be butted end to end and don’t need to overlap.

Use a 4” to 6” joint knife to embed the tape. The 4” knife works well for doing most seams but may not control the excess compound well. A 5” or 6” joint knife has more blade width for less mess. The 5” flexible joint knife is a comfortable size to work with and may give overall best results.

Start at the top corner with a length of tape you can easily handle. Tuck the tape into the corner with your drywall joint knife or fingers. Holding the tape in place, start at the top, embed the tape on one side, then the other working your way down. Smooth off well and continue. Estimate the length of tape you need to finish the rest of the corner, pull it out and apply starting at the floor. Cut off any extra tape at the bottom of the top piece by holding your drywall knife in the corner and pull the tape to cut. Smooth the tape and you are done. You can use a flat knife or corner trowel for this process. The finished corner should be sharp so we suggest you embed corners with a flat joint knife. If you prefer to use one length of tape, pull the tape out and fold mudded sides together until you have the proper length needed. Start at the top of the corner and let the tape unfold to the floor.

Plastic outside corners work very well and may be purchased most wherever drywall supplies are sold. Metal corners tend to rust, especially when used in high moisture areas like bathrooms, basements or under wall paper coverings. Plastic corners are stapled or fastened on the corner using setting compounds. They are easy to apply, give you a nice corner for the finished product and will never rust. You can run a piece of drywall tape over the edge of the corner bead for a better buildup and stronger grip but make sure it stays below the surface of your finished wall.

TapeBuddy makes it easy to tape ceiling joints! Position your bench under the seam you are working on, pull out your tape (about 4 to 5 feet), and step onto your bench. Press one end of the tape to the seam and align the other end with the seam. Because the mud is on the tape, it will stick instantly. Embed, smooth and you’re ready for the next piece. Helpful hint: Before you step down, use the excess compound for the first coat on the screws you can reach.

Downloadable PDF

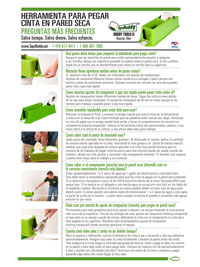
FAQ Spanish

popcorn ceiling removal machine
Download PDF

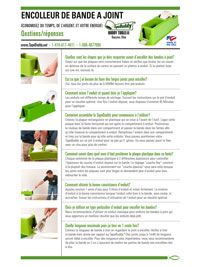
FAQ French

fibafuse drywall tape
Download PDF

Money-Back Guarantee

We’re so confident that you will like our products that if you are not satisfied within 30 days, you can return it for a full refund.

Fast Shipping

We know you’re excited to get started on your project so we do our best to get your tools out to you as quickly as possible.

Best sale price

We appreciate your business and ensure the lowest prices on all of our products with monthly sales and deals!

Contact Us

Have more questions? We’ll be happy to answer them all. Have a look at the most frequently questions asked and if you feel that your question is not answered use the contact form to send us an email.